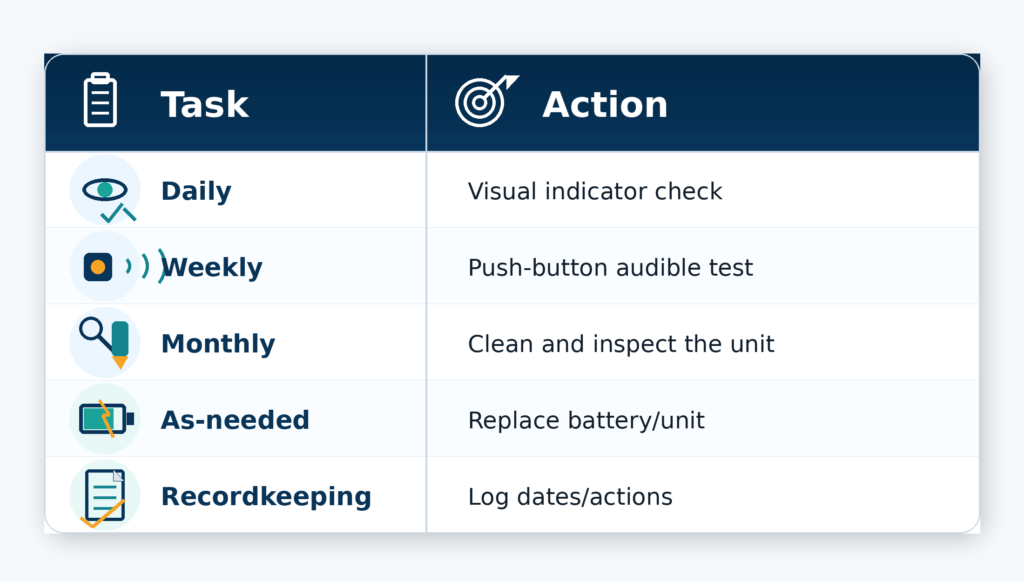
Homeowners should visually inspect fire alarms daily for damage or indicator lights. They should press the test button weekly to confirm a loud alarm. Monthly cleaning of vents and battery checks prevents dust and weak power. Replace batteries as needed and swap units that are older than 8–10 years or have persistent faults. Follow type‑specific care for photoelectric, ionisation, heat, or combo units. A simple log helps track actions, and more detailed schedules and fixes follow below.
Key Takeaways
- Visually inspect alarms daily for damage, indicator lights, or loose mounting.
- Test each alarm by pressing its button weekly to confirm the audible signal.
- Clean vents and check batteries monthly; replace batteries immediately if chirping.
- Replace any unit showing persistent faults, corrosion, or older than 8–10 years.
- Call a professional for recurring false alarms, wiring problems, or before upgrading to monitored systems.
Table of Contents
Test a Smoke Alarm Right Now: 5 Quick Steps
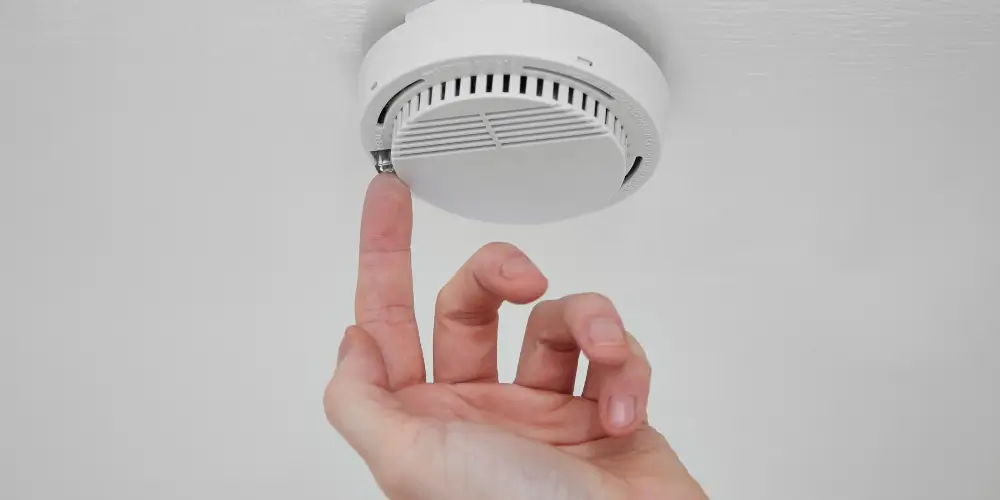
Begin by locating each smoke alarm in the home and standing on a stable surface beneath one unit; this quick, focused check will confirm that the device is powered and functioning. Next, press and hold the alarm’s test button for several seconds; a loud, clear horn indicates the electronic circuit and battery (if present) are working. Third, replace any battery that produces a weak tone or chirp, and note the date and battery type for future reference. Fourth, inspect the exterior for dust, insects, or paint that might block sensors; gently vacuum or wipe the housing, following the manufacturer’s guidance. Finally, if the alarm fails to sound, displays error indicators, or is more than ten years old, replace the unit immediately with a certified model and follow installation instructions for proper placement. Learn how to test a fire alarm in detail.
Follow This Smoke‑Alarm Testing Schedule (Daily, Weekly, Monthly)
A simple, regular testing schedule, including daily quick checks, weekly function tests, and monthly maintenance, helps affirm smoke alarms remain reliable and respond when needed. The guidance below outlines concise actions: daily visual checks confirm indicators (power lights, no obvious damage) look normal; weekly tests press the alarm button to verify audible response; monthly tasks include cleaning dust from vents, verifying battery condition, and checking mounting stability. Record each test with the date and any corrective action. If an alarm fails any test, replace batteries immediately and retest; persistent failure requires replacement of the unit. Households with vulnerable occupants or higher-risk activities may increase the frequency of testing. Keeping a simple log supports routine and assists emergency planning. Professional inspections can supplement annual home checks.
Testing Schedules by Alarm Type: Photoelectric, Ionisation, Heat, Combo
Regularly tailoring testing to the alarm type guarantees each sensor is verified by the checks it needs: photoelectric alarms require weekly button tests and monthly cleaning to remove dust that impedes optical chambers; ionisation alarms benefit from the same cadence but also periodic exposure to a controlled smoke source during professional inspections because small-particle sensitivity can drift; heat alarms, used where smoke alarms are unsuitable, need monthly functional tests of their heat-sensing element and wiring plus immediate checks after cooking or appliance use; combo units follow the strictest schedule of their components and should have each sensor type tested and maintained according to its specific guidance.
Owners should record test dates and any maintenance performed. Replace or service units that fail routine tests or show erratic behavior. Position-specific considerations matter: kitchens, garages and dusty areas require more frequent cleaning and inspection. Professional inspections every 1–3 years are advisable for ionisation and combo models to confirm sensor alignment and sensitivity. Clear labeling of alarm types simplifies adherence to schedules and helps prioritise actions when a fault appears.
Replace Batteries or Replace the Alarm: Clear Decision Rules
Having established type-specific testing and maintenance routines, the next decision is whether a failing alarm needs a battery change or full replacement. Determination rests on age, indications of fault, and performance. If a unit chirps or shows a low-battery indicator yet responds correctly during a manual test, replacing the battery is appropriate. Use manufacturer-recommended batteries and record the date. If an alarm repeatedly signals low battery within months, fails self-tests, emits irregular sounds, or is older than its rated service life (commonly 8–10 years for smoke alarms), replacement is warranted.
Visible damage, corrosion in the battery compartment, or an alarm that no longer resets after a battery replacement also indicate the need for replacement. For hardwired systems, persistent faults or age-related component wear require professional replacement. When in doubt, prioritise replacement: a properly functioning alarm is essential for safety. Retain model and manufacture date information to guide timely replacement and compliance with warranty or local regulations.
Clean, Position, and Care for Alarm Sensors
Maintain sensors by keeping them clean, correctly placed, and protected from environmental hazards to guarantee reliable detection. The homeowner must inspect detectors monthly for dust, cobwebs, or paint that can block sensors. Cleaning with a soft brush or vacuum inlet avoids damage; avoid spraying cleaners directly. Positioning follows simple rules: ceiling-mounted in sleeping areas and hallways, at least 10 feet from cooking appliances to reduce nuisance alarms, and away from vents or humid corners where false readings or sensor degradation can occur.
Regular care includes checking mounting stability and replacing units older than their recommended service life. Environmental protection means shielding smoke alarms from excessive dust, kitchen grease, or extreme humidity in bathrooms; consider photoelectric or specialty units where conditions warrant. Small, consistent steps maintain responsiveness and peace of mind.
- Clean gently to preserve sensitivity.
- Place thoughtfully to cover sleeping areas.
- Protect from moisture, dust, and fumes.
Fix Chirps, False Alarms, and Alarms That Won’t Stop
Why is my fire alarm beeping? Keeping alarms clean and well-placed reduces many issues, but occasional chirps, false activations, or persistent sounding still occur and require prompt, methodical response. When a unit chirps intermittently, it often signals a low battery or an end-of-life condition; consult the model’s indicator pattern, replace batteries with the recommended type, and note the manufacturer’s dates. For false alarms, identify common causes: cooking smoke, steam, insects, or dust. Relocate or add heat-type detectors where appropriate, adjust sensor placement, and clean sensors before concluding they are faulty.
If an alarm will not stop, silence it following the manufacturer’s temporary mute procedure, then address the root cause clear smoke, ventilate, or power-cycle hardwired units after confirming safety. Persistent faults may require replacement rather than repair. For any uncertainty or repeated failures, contact a qualified technician or the manufacturer for diagnostics to guarantee reliable long-term protection. You can check here how to turn off the fire alarm safely and quickly
Record and Track Alarm Checks (Simple Log + Templates)
Start a simple log to record each alarm check, noting date, time, location, battery status, test result, and any corrective actions taken. Maintaining concise records helps spot patterns and guarantees accountability in household safety routines. A basic template spreadsheet columns or a printed notebook keeps entries uniform and easy to review. Include fields for model number and replacement date to manage end-of-life proactively. Brief notes on false alarms, chirps, or sensor obstructions provide context for future troubleshooting.
Keeping a visible, shared log encourages consistent checks and reduces the chance of missed maintenance. Periodic reviews of the log reveal trends that may indicate failing batteries or sensors before they become critical.
- Relief: confirming each alarm works lowers anxiety about unseen risks.
- Confidence: clear records support timely battery or unit replacement.
- Preparedness: documented actions simplify handoffs to other household members or renters.
When to Call a Pro or Upgrade to a Monitored System
When should a homeowner escalate beyond routine checks and seek professional help or a monitored alarm service? A homeowner should consider a professional inspection when alarms exhibit persistent faults, frequent false alerts, or unexplained chirping after basic troubleshooting. Technicians can diagnose wiring issues, aged sensors, or compatibility problems in interconnected systems that DIY fixes may miss. Upgrading to a monitored system is advisable if occupants desire faster emergency response, remote alerts, or verified alarm signals accepted by local authorities. Homes with mobility-limited residents, frequent travel, or valuable belongings benefit from 24/7 monitoring and professional maintenance contracts. Professional services also aid in compliance with insurance requirements or building codes following renovations. Before committing, compare monitoring plans, false-alarm policies, installation warranties, and monthly costs. Seek licensed providers with clear service-level agreements and local references. A measured decision weighs current alarm reliability, household risk factors, and budget against the increased assurance and potential liability reduction offered by professional support.
Yearly Smoke‑Alarm Checklist: A 12‑Month Timeline
A simple, month-by-month checklist helps homeowners stay on top of smoke-alarm maintenance without overlooking critical tasks. Over twelve months, a clear cadence prevents complacency and protects lives. Each month focuses on a small, specific action: testing alarms, replacing batteries when needed, cleaning units, and noting manufacture dates. Record results in a log to track aging devices and plan replacements at the 10-year mark.
- Test alarms monthly, replace batteries annually, and silence nuisance alerts promptly.
- Clean alarms quarterly, inspect for dust or paint buildup, and vacuum gently around units.
- Replace any unit older than ten years, upgrade to interconnected or smart models as budgets allow.
This timeline reduces anxiety by turning maintenance into manageable steps. Following it guarantees alarms respond reliably and that families can make informed choices about repairs or upgrades without last-minute panic. Check out how often you need smoke alarm testing and other essential guidance.
Frequently Asked Questions
How Do Smoke Alarms Perform in High-Humidity Bathrooms?
They perform poorly if exposed to steam: humidity can cause false alarms, sensor corrosion, or reduced sensitivity. Manufacturers advise avoiding placement inside bathrooms; instead, install alarms just outside, and choose moisture-resistant models for nearby coverage and reliability.
Can Pets Trigger Different Types of Alarms?
Yes, pets can trigger smoke, heat, and carbon monoxide alarms. Small animals’ dander or fur may set off optical smoke sensors; vigorous movement or body heat can affect heat detectors; messes near vents can influence CO sensors.
Do Smart Alarms Need Wi‑Fi to Detect Smoke Reliably?
No, smart alarms do not require Wi‑Fi to detect smoke; their core sensing and local alarms function independently. Wi‑Fi enables alerts, remote monitoring, and updates, but smoke detection remains reliable without an internet connection.
Are There Health Risks From Frequent Alarm Testing?
No, brief routine testing poses minimal health risk; prolonged loud alarms can cause hearing discomfort or stress. Individuals with sensitivities should limit exposure, use hearing protection, and consult professionals if testing provokes significant symptoms.
How Should Alarms Be Handled During Home Renovations?
During renovations, alarms should be temporarily covered or isolated per manufacturer guidance, with power turned off only if necessary. Contractors should coordinate testing, avoid dust intrusion, and restore and verify full functionality before project completion.
Conclusion
Regular testing, timely battery or unit replacement, cleaning, and proper placement form the core of effective home fire protection. Adhering to recommended daily, weekly, and monthly checks, following type‑specific guidance, and promptly addressing chirps or false alarms keeps detectors reliable. Recording inspections and knowing when to call a professional or consider monitored systems adds layers of safety. Consistent, documented maintenance over the year guarantees alarms perform when needed, reducing fire risk and enhancing household preparedness.