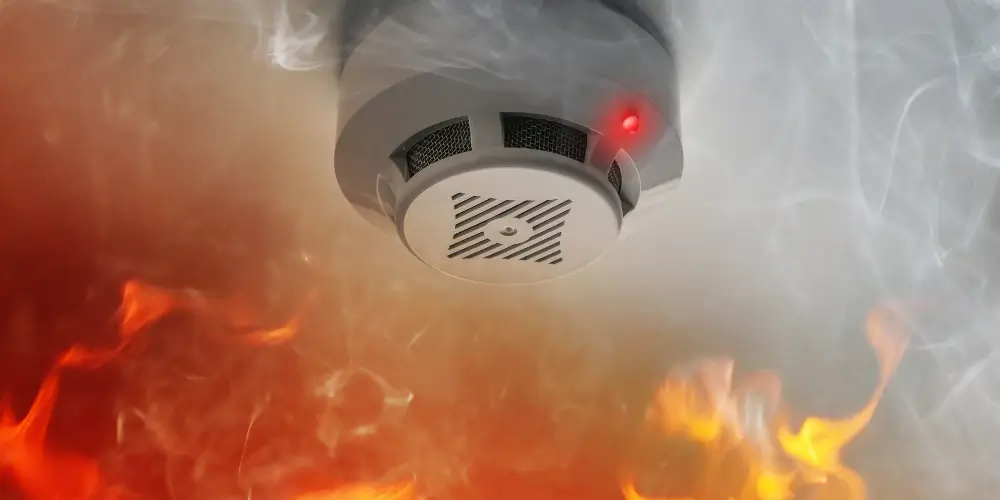
How to Remove a Fire Alarm. First, identify whether the alarm is battery-only or hardwired by looking for a battery drawer, “AC/120V” labelling, or a green power light. Silence it with the hush/test button, then remove the battery or switch off the breaker for hardwired units. Use a step stool and, if needed, a screwdriver or plastic pry tool. Most covers twist off about ¼ turn counterclockwise; then press the plug tab to unplug. More tips follow for stuck, painted, or clip-on covers.
Key Takeaways
- Identify whether the alarm is battery-only or hardwired by checking for a battery drawer, “AC/120V” label, or a green power light.
- Silence the alarm first using the hush/test button to stop the siren while you work.
- Cut power safely: remove the battery for battery models, or switch off the breaker for hardwired alarms and verify power is off.
- Remove the cover by twisting it about a quarter-turn counterclockwise while holding the base steady; use a rubber grip pad for traction.
- For hardwired units, press the connector’s locking tab and pull the plug straight out, avoiding any tugging on the wires.
Table of Contents
Identify the Alarm Type (Battery vs Hardwired)
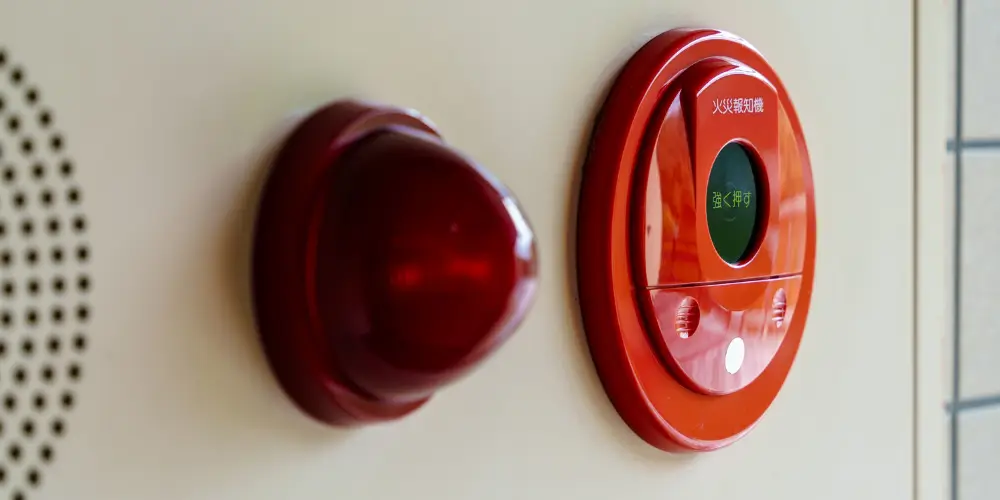
A quick visual check can reveal what kind of smoke alarm is on the ceiling. Most units fall into two camps: battery-only or hardwired with a battery backup. A battery model often has a visible battery drawer on the side or back, plus a simpler mounting base with no cable entering the housing.
Hardwired alarms usually sit on a round ceiling box and may show a narrow gap where a wire bundle or plug-in harness connects behind the unit. Some also display “AC” or “120V” on the label, or list an interconnect feature that links multiple alarms.
If the unit has a green power indicator that stays on, it’s commonly hardwired. For certainty, the homeowner can twist the alarm slightly and look for a plastic connector; batteries alone won’t use one. Identifying the type helps plan the least-restrictive, most-controlled removal approach.
Silence the Alarm and Cut Power First
How to Remove a Fire Alarm. Start by silencing the unit to prevent a continuous siren while it’s being handled, then remove power before attempting to loosen the cover or body. Most alarms have a hush/test button; a firm press typically buys several quiet minutes. If it keeps chirping, the unit may be signalling a low battery or an active fault, so proceed methodically rather than forcing parts. For battery models, open the battery drawer or compartment and remove the battery, then wait for the alarm to fully power down.
For hardwired models, switch off the correct circuit at the breaker panel and confirm the alarm is no longer receiving power. If the alarm is interconnected, silencing one may not stop all units; the breaker step prevents a house-wide chorus.
Cutting power first protects the user’s hands, avoids accidental shorting, and keeps the homeowner in control of the work area during removal.
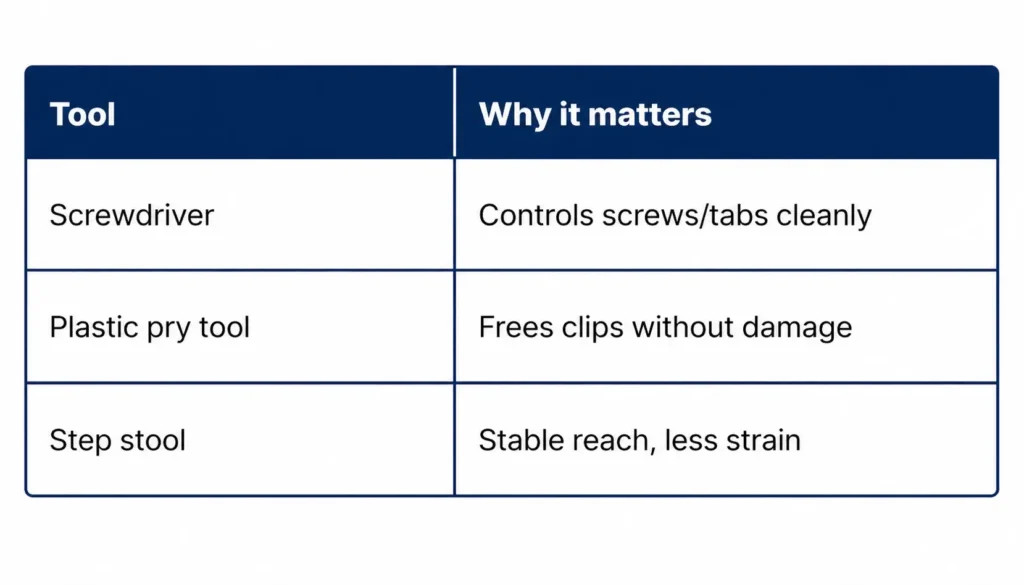
Tools That Help Remove the Cover
How to Remove a Fire Alarm. Only a few basic tools make removing a fire alarm cover faster and less likely to damage the plastic: a Phillips or small flathead screwdriver for retaining screws or tabs, a non-marring pry tool (plastic putty knife or spudger) to release clips without cracking the housing, and a step stool to keep hands steady at ceiling height; for hardwired units, a non-contact voltage tester and a flashlight help verify power is off and reveal hidden fasteners. A small container for screws prevents lost hardware and unnecessary repeat trips. Needle-nose pliers can help grip stubborn battery doors or small connectors without brute force. Avoid metal prybars or knives; they invite gouges and can turn a quick job into a replacement.
Remove a Twist-Off Fire Alarm Cover (¼ Turn)
Once the power and any locking features are addressed, a twist-off fire alarm cover typically releases with a short ¼-turn rotation: the unit is held by a bayonet-style mount, so steady the base with one hand, rotate the cover counterclockwise until the tabs align with the slots, then lower it straight down to avoid stressing the plastic clips or tugging on wiring.
If the cover resists, it is usually seated tightly on the gasket, or paint has bridged the seam. A firm, even twist is preferred over prying, which can crack the housing and reduce future reliability. A rubber jar-grip pad can increase traction without forcing the plastic beyond its limits.
The cover should be supported as it comes free,e so it does not swing and strain any connected leads. Once removed, the cover can be set aside in a clean, dry spot, preserving the user’s ability to service the device on their own terms without unnecessary damage.
Release a Clip-On Fire Alarm Cover Tabs
Unlike twist-off models, a clip-on fire alarm cover is retained by spring tabs that must be released rather than rotated. The cover typically snaps into a mounting ring, and each tab needs gentle pressure to disengage.
A thin flat tool or a fingernail can be used at the seam, but force is avoided to prevent cracking the plastic or bending the tabs. The unit is supported with one hand while the other presses the tab inward; once the first tab releases, the cover is eased down, and the remaining tabs are released in sequence.
If resistance persists, the seam is checked for paint buildup or a hidden latch point.
- Regain control without breaking fragile parts.
- Feel the relief of a clean, quiet release.
- Avoid the frustration of a stuck cover.
Unplug the Hardwired Connector Safely
Support the alarm body with one hand and locate the hardwired plug at the back of the unit. With power already shut off at the breaker, the connector can be separated without forcing it. Most alarms use a small, keyed harness that slides into a socket; it only fits one way, so twisting is unnecessary.
Press the locking tab on the plug using a thumb or a flat screwdriver tip, then pull the plug straight out by its plastic housing. Avoid tugging on the wires; that strains the crimp points and compromises future reliability.
If the alarm has a battery drawer, keep it closed while disconnecting to prevent accidental beeps. Set the unit down on a stable surface, keeping the ceiling wires undisturbed. Once the harness is free, the cover and alarm body can be handled independently, allowing full control for inspection, cleaning, or replacement without working on live connections.
Always verify power is off with a non-contact tester first.
Fix a Stuck Fire Alarm Cover (Paint, Pins, Tabs)
Although the power may be off and the alarm body removed, a cover can still bind to the mounting ring due to dried paint, stiff locking tabs, or alignment pins that have not fully released. The safest approach is controlled, patient force rather than twisting harder until the plastic snaps.
First, score any paint seam with a sharp utility knife, circling the rim to break the bond without gouging drywall. Next, press the cover inward slightly, then rotate it in the release direction while depressing the locking tabs with a small flat screwdriver. If pins are hanging up, wiggle the cover in tiny arcs while pulling straight down to clear them.
- Regaining control can feel like reclaiming a small piece of the home.
- A calm, deliberate release avoids the sickening crack of broken tabs.
- Clean separation keeps options open, not forced by damage.
If resistance persists, verify no hidden screw or tamper clip remains engaged.
Reinstall the Cover and Test the Alarm
Seat the cover back onto the mounting ring, align any tabs or pins, and rotate it until it locks flush, with no rocking or gaps.
If the unit uses a battery drawer, close it fully; if it uses a loose battery, match polarity and press the connector firmly. Restore power at the breaker only after the cover is secured, keeping control of the process and avoiding surprise chirps.
Press and hold the Test/Silence button until the alarm sounds, then release. A strong, steady tone and a flashing indicator light confirm basic function.
For interconnected alarms, confirm that other units also sound; if they do not, recheck wiring connections and mounting alignment. If the alarm fails to test, replace the battery, check the manufacturing date, and replace the unit if it has expired.
After testing, let the alarm reset, then verify it sits flat, and the button is accessible.
Frequently Asked Questions
Do I Need Landlord Permission Before Removing a Smoke Alarm Cover?
Usually, yes; tenants should get the landlord’s permission before removing a smoke alarm cover, because tampering can breach lease terms and safety codes. If urgent maintenance is needed, they should notify in writing and restore promptly.
Will Removing the Cover Void the Alarm’s Warranty?
Removing the cover usually does not void the warranty, but misuse or damage can. They should check the manufacturer’s terms, avoid tamper seals, and document actions, ensuring personal choice while staying within safe, lawful limits.
How Often Should I Replace the Entire Smoke Alarm Unit?
Most smoke alarm units should be replaced every 10 years; some models require 7 years check the date label. Choosing replacement on schedule preserves independent safety. Warranty impact varies by brand; cover removal usually doesn’t void it.
Are Smoke Alarm Covers Interchangeable Between Different Brands and Models?
Smoke alarm covers generally are not interchangeable across brands and models, since mounting tabs, dimensions, and sensor pathways vary. For maximum freedom and safety, he should use the manufacturer-matched cover or approved replacement, not improvised swaps.
What Should I Do if the Alarm Contains Asbestos-Contaminated Dust?
If asbestos-contaminated dust is suspected, the alarm should not be disturbed; power should be isolated, the area sealed, and an accredited asbestos professional contacted. Individuals should avoid DIY cleanup, document conditions, and seek independent testing.
Conclusion
How to Remove a Fire Alarm. Removing a fire alarm cover is safest when the alarm type is confirmed first, then the unit is silenced, and power is disconnected if the unit is hardwired. With basic tools, most covers come off by a quarter-turn twist or by releasing side tabs without forcing the housing. If the cover is stuck due to paint or debris, gentle prying and careful inspection prevent damage. After unplugging and completing any work, the cover should be reinstalled securely and the alarm tested.